
INTERODUCTI:-
If you have ever sat in front of a blank white screen and wondered where to even begin, you are in exactly the right place. Microsoft Word for beginners can feel intimidating at first glance — with its ribbons, menus, formatting options, and dozens of tools staring back at you all at once. But here is the truth that every confident Word user knows: once you understand the basics, everything else falls into place naturally and quickly.
Microsoft Word is the world’s most widely used word processing software. It is used in schools, offices, hospitals, legal firms, creative agencies, and homes in virtually every country on earth. Learning it is not just a technical skill — it is a career essential, an academic necessity, and a daily life tool rolled into one powerful program.
This complete step-by-step tutorial on Microsoft Word for beginners will walk you through everything — from opening the program for the first time to formatting professional documents, using essential features, saving your work, and printing with confidence. By the end of this guide, you will wonder why you ever found it intimidating.
What Is Microsoft Word and Why Should You Learn It?

Before diving into the tutorial, let us briefly understand why Microsoft Word for beginners is worth mastering. Microsoft Word is a word processor — software specifically designed for creating, editing, formatting, and printing text-based documents. From a simple shopping list to a 200-page academic thesis, Word handles it all with remarkable ease.
Here are some real-world documents you can create with Word:
- Professional resumes and cover letters that get you hired.
- School assignments, essays, and research papers.
- Business letters, invoices, and official reports.
- Newsletters, flyers, and creative writing projects.
- Meeting agendas, project plans, and contracts.
With over one billion users worldwide and integration across Windows, Mac, tablets, and smartphones, Word is undoubtedly the single most important productivity application anyone can learn. And with this guide as your companion, it has never been easier to get started.
How to Open Microsoft Word and Understand the Interface
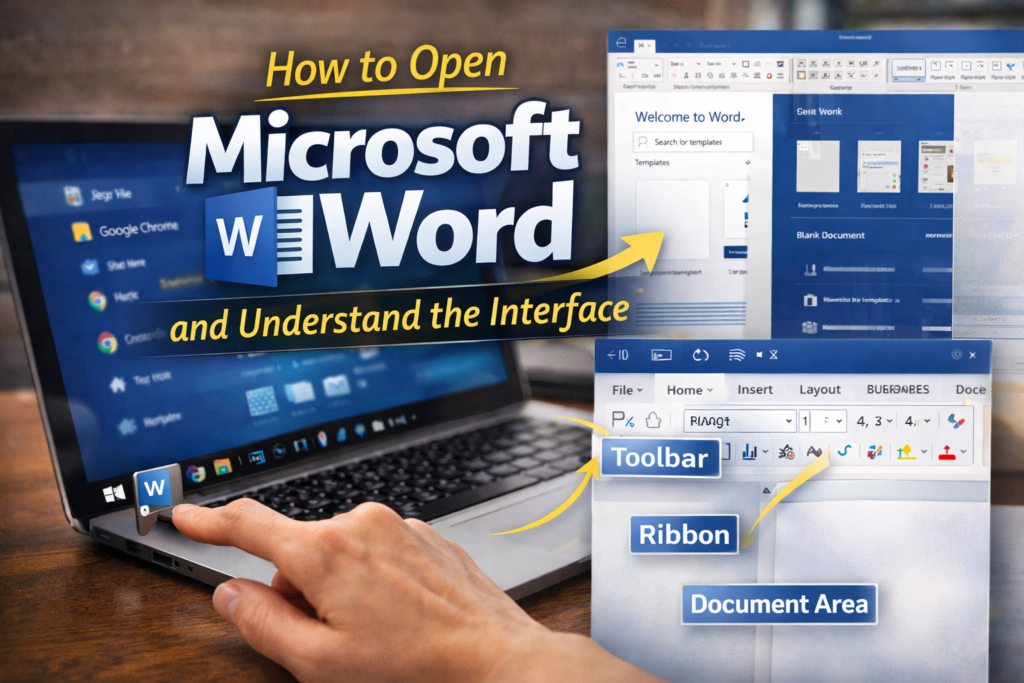
The very first step in any Microsoft Word for beginners tutorial is simply opening the program and getting familiar with what you see. Do not worry about mastering every button immediately — focus on the key areas described below.
Opening Word on Windows:
- Click the Start button (Windows icon) at the bottom-left of your screen.
- Type ‘Microsoft Word’ in the search bar and press Enter.
- Click the Word icon that appears. The program will open within a few seconds.
- On the Welcome screen, click ‘Blank Document’ to start with a fresh, empty page.
Key Parts of the Word Interface:
- Title Bar (top): Shows the name of your document. New documents are named ‘Document1’ until you save them with a proper name.
- Ribbon (below title bar): The wide toolbar with all Word’s features organized into tabs — Home, Insert, Design, Layout, References, and more.
- Document Area (center): The white page where you type your text. The blinking vertical line is your cursor — text appears wherever the cursor is placed.
- Status Bar (bottom): Shows your current page number, word count, and document language.
- Quick Access Toolbar (top-left): A small row of frequently used buttons — Save, Undo, and Redo. You can customize it to add your own favourite commands.
Typing, Editing, and Basic Text Controls in Microsoft Word for Beginners
Now that your document is open, it is time to start typing. This is the core of what Microsoft Word for beginners is all about — creating text and knowing how to control it.
Basic Typing Tips:
- Simply click anywhere on the white document area and start typing. Text will appear at your cursor position.
- Press Enter to start a new paragraph. Press Shift + Enter to move to the next line without creating a new paragraph.
- Press Backspace to delete the character to the left of the cursor. Press Delete to remove the character to the right.
- Press Ctrl + Z at any time to undo your last action. Ctrl + Y redoes it. These are lifesavers for beginners!
Selecting Text:
Before you can format, copy, or delete text, you need to select it first. Here are the essential selection methods:
- Click and drag your mouse across any text to highlight and select it.
- Double-click a word to select just that word.
- Triple-click anywhere in a paragraph to select the entire paragraph.
- Press Ctrl + A to select all text in the entire document at once.
Text Formatting: Making Your Document Look Professional
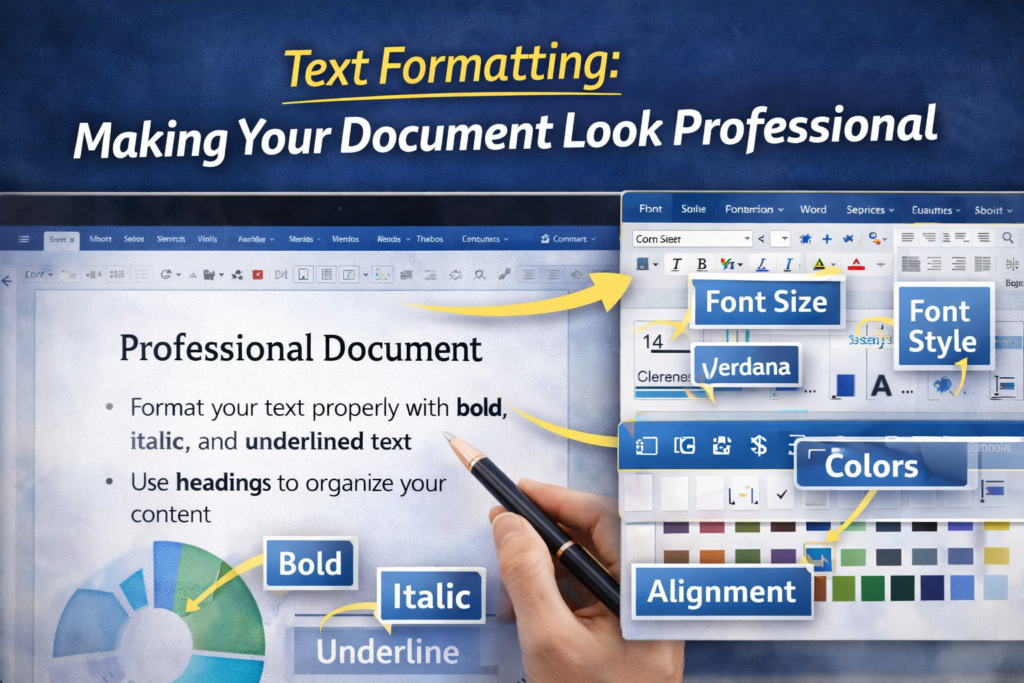
One of the biggest advantages of learning Microsoft Word for beginners is discovering how easy it is to make your documents look polished and professional. The Home tab in the Ribbon is your formatting headquarters. Here is a breakdown of the most important formatting tools:
Font Formatting:
- Font Type: Change the style of your text. Popular professional choices include Arial, Calibri, Times New Roman, and Georgia.
- Font Size: Control how large or small your text appears. Body text is usually size 11 or 12. Headings are typically 14–18.
- Bold (Ctrl + B): Makes text thicker and heavier. Use for headings and important words.
- Italic (Ctrl + I): Slants text to the right. Used for book titles, technical terms, or gentle emphasis.
- Underline (Ctrl + U): Draws a line beneath text. Common in headings and hyperlinks.
- Font Color: Change text color using the ‘A’ with a colored bar underneath in the Home tab.
Paragraph Formatting:
- Alignment: Left-align (Ctrl + L) is standard for body text. Center (Ctrl + E) for titles. Right-align (Ctrl + R) for dates or addresses. Justify (Ctrl + J) for a clean newspaper-style look.
- Line Spacing: Found in the Paragraph section of the Home tab. Double spacing (2.0) is standard for academic papers. 1.15 or 1.5 is common for business documents.
- Bullets and Numbered Lists: Click the bullet or number list icons to organize information cleanly. Great for instructions, requirements, or feature lists.
How to Save Your Document – Never Lose Your Work Again
Saving your work is a habit every Microsoft Word for beginners user must build from day one. Losing an unsaved document is one of the most frustrating experiences in computing — and it is entirely avoidable.
Saving for the First Time (Save As):
- Press Ctrl + S or click File > Save As.
- Choose a location: This PC > Documents is the safest default choice.
- Type a clear, descriptive file name in the File Name box (e.g., ‘Job Application Letter – March 2025’).
- Choose the file format. ‘.docx’ is the standard Word format. Use ‘.pdf’ if you want a file that cannot be edited.
- Click Save. Your document is now stored safely.
Quick Save and Auto Save:
After the first save, press Ctrl + S every few minutes to update the file with your latest changes. Better yet, enable AutoSave — if your Word is connected to OneDrive (Microsoft’s cloud storage), a toggle switch at the top-left of the screen will auto-save your document every few seconds. This is one of the most valuable features for any Microsoft Word for beginners user.
Using Headings and Styles to Structure Your Document
One skill that separates casual users from confident ones in Microsoft Word for beginners training is understanding Styles. Styles are pre-designed formatting combinations for different types of text — like headings, subheadings, body text, and captions. Using them correctly makes your document look professional and also enables Word to automatically generate a Table of Contents.
- Heading 1: Use for your main document title or major chapter headings. Large and bold.
- Heading 2: Use for section headings within chapters. Slightly smaller than Heading 1.
- Heading 3: Use for sub-sections within sections. Even smaller and often italic.
- Normal (Body Text): The default style for all regular paragraph text.
To apply a style, simply place your cursor in the paragraph you want to format, then click the appropriate Style in the Styles gallery on the Home tab. The text will instantly transform to match that style. You can also right-click any style to modify its font, size, and color to match your personal preferences.
Inserting Images, Tables, and Other Elements
Microsoft Word is not just a text editor — it is a full document creation suite. As you progress in your Microsoft Word for beginners journey, you will want to enrich your documents with visual elements. Here is how to do the most common insertions:
Inserting an Image:
- Click the Insert tab in the Ribbon.
- Click ‘Pictures,’ then choose ‘This Device’ to insert an image saved on your computer.
- Browse to your image file, select it, and click Insert.
- Click on the image and use the handles around it to resize. Right-click for more layout and wrapping options.
Inserting a Table:
- Click the Insert tab, then click ‘Table.’
- Hover over the grid that appears to select how many rows and columns you need.
- Click to insert the table. It will appear in your document immediately.
- Click inside any cell to start typing. Press Tab to move to the next cell. Right-click the table to add or delete rows and columns.
Page Setup: Margins, Orientation, and Page Size
Proper page setup is an important but often overlooked area in Microsoft Word for beginners guides. Before printing or submitting a document, you need to make sure the page is configured correctly. Here is what to check:
- Margins: Click the Layout tab > Margins. The default ‘Normal’ margin (1 inch on all sides) works for most documents. Academic submissions often require specific margin settings specified by the institution.
- Orientation: Click Layout > Orientation to switch between Portrait (tall page, most common) and Landscape (wide page, useful for tables and charts).
- Paper Size: Click Layout > Size to select A4 (standard in most of the world) or Letter (common in the USA). Always check which size is required before printing.
- Page Numbers: Click Insert > Page Number to add automatic page numbers at the top or bottom of every page. Essential for any multi-page document.
Spell Check, Grammar Check, and Find & Replace
Two of the most practical features for any Microsoft Word for beginners user are the automatic spelling and grammar checker, and the powerful Find & Replace tool. Together, they save enormous amounts of time and help ensure your documents are error-free.
Spelling and Grammar Check:
- Word automatically underlines misspelled words in red and grammar errors in blue as you type.
- Right-click any underlined word to see suggested corrections and choose the correct one.
- For a full document check, press F7 or go to Review > Spelling & Grammar. Word will walk you through every issue one by one.
Find & Replace (Ctrl + H):
Imagine you have written a 10-page report and misspelled someone’s name throughout — correcting it manually would take forever. Instead, press Ctrl + H to open Find & Replace. Type the incorrect word in the ‘Find what’ box and the correct version in the ‘Replace with’ box, then click ‘Replace All.’ Word fixes every instance in seconds. This is one of the most powerful time-saving tools in all of Microsoft Word.
How to Print a Document from Microsoft Word
Printing is one of the final steps in any Microsoft Word for beginners workflow. Whether you are printing a CV, a school assignment, or a business letter, the process is simple and straightforward.
- Press Ctrl + P or go to File > Print to open the Print dialog.
- On the left, you will see all print settings. On the right is a preview of how your document will look when printed.
- Select your printer from the Printer drop-down menu.
- Set the number of copies needed.
- Choose which pages to print — all pages, the current page, or a specific range (e.g., pages 1-3).
- Click the Print button. Your document will start printing immediately.
Essential Keyboard Shortcuts Every Microsoft Word for Beginners User Should Know
Keyboard shortcuts are the fastest way to work in Word. Once you memorize even five or six of these, your speed and efficiency will improve dramatically. Here is a cheat sheet of the most important shortcuts for Microsoft Word for beginners:
- Ctrl + N — Open a new blank document.
- Ctrl + O — Open an existing document from your computer.
- Ctrl + S — Save the current document.
- Ctrl + P — Print the current document.
- Ctrl + Z — Undo the last action.
- Ctrl + Y — Redo the last undone action.
- Ctrl + C — Copy selected text or object.
- Ctrl + X — Cut selected text or object.
- Ctrl + V — Paste copied or cut content.
- Ctrl + A — Select all content in the document.
- Ctrl + F — Find a word or phrase in the document.
- Ctrl + H — Find and Replace a word or phrase.
- Ctrl + Home / Ctrl + End — Jump to the very beginning or end of your document instantly.
Top Tips to Level Up Your Microsoft Word for Beginners Skills
Now that you have covered all the fundamentals, here are some bonus tips that will take your Microsoft Word for beginners knowledge to the next level and help you produce truly impressive documents:
- Use Templates: Word comes with hundreds of beautiful pre-designed templates for resumes, letters, reports, and calendars. Click File > New and browse the template library to find one that suits your needs. Starting from a template is much faster than building a document from scratch.
- Use the Navigation Pane: Press Ctrl + F and click the ‘Headings’ tab to see all your headings listed as an instant table of contents on the left side. This makes jumping between sections of long documents incredibly easy.
- Track Changes: When collaborating with others, use Review > Track Changes to record every edit made to the document. Reviewers can then accept or reject each change individually — a professional tool used in legal, academic, and business writing.
- Word Count: Always check your word count using Tools > Word Count or the counter at the bottom of the screen. This is especially important for academic submissions and content writing projects with specific word limits.
- Save as PDF: When sharing a finished document, always save a copy as PDF (File > Save As > PDF). PDFs preserve your formatting perfectly and cannot be accidentally edited by the recipient.
Conclusion: You Are Ready to Create with Confidence
Congratulations on completing this step-by-step tutorial on Microsoft Word for beginners! You have covered an enormous amount of ground — from opening the program and understanding the interface, to typing, formatting, saving, inserting images, setting up pages, checking spelling, printing, and mastering essential keyboard shortcuts.
The most important next step is practice. Open a blank document right now and start experimenting. Write a short letter, format it, save it as a PDF, and print it. Each time you use Word, these features will become more familiar and more automatic. Within just a few days of regular use, what once felt overwhelming will feel completely second nature.
Microsoft Word is one of those skills that rewards every minute of investment you put into it. Whether your goal is to write a better resume, produce smarter school work, or handle professional documents more efficiently — mastering Microsoft Word for beginners is a milestone that will serve your career and your life for many decades to come. Start today, and enjoy the journey.